
Last updated: July 10, 2026
By Home Repair Genie
Home Repair Genie is a participant in the Amazon Services LLC Associates Program. As an Amazon Associate, we earn from qualifying purchases. This comes at no additional cost to you and helps support our site.
Quick Answer
How to fix a leaky faucet is one of the most common plumbing repairs homeowners face. A dripping faucet can waste water, increase your utility bill, and become an annoying problem if left unchecked.
A leaky faucet is usually caused by a worn-out washer, O-ring, or cartridge. You can fix it by turning off the water supply, taking the faucet apart, and replacing the faulty part. Most repairs take under 30 minutes.
Most people learn how to fix a leaky faucet in under 30 minutes with basic tools like a wrench and screwdriver, making this an easy and cost-effective DIY project for most homeowners.
Tools Needed
- Durable adjustable wrench like this one
- Multi-bit screwdriver set (reliable option here)
- Allen wrench like this one
- High-quality plumber’s tape (grab it here)
- Cloth or rag
Materials Needed
- Replacement washer or cartridge set like this one
- O-ring (if needed)
- Cleaning cloth
Step-by-Step Instructions for How to Fix a Leaky Faucet
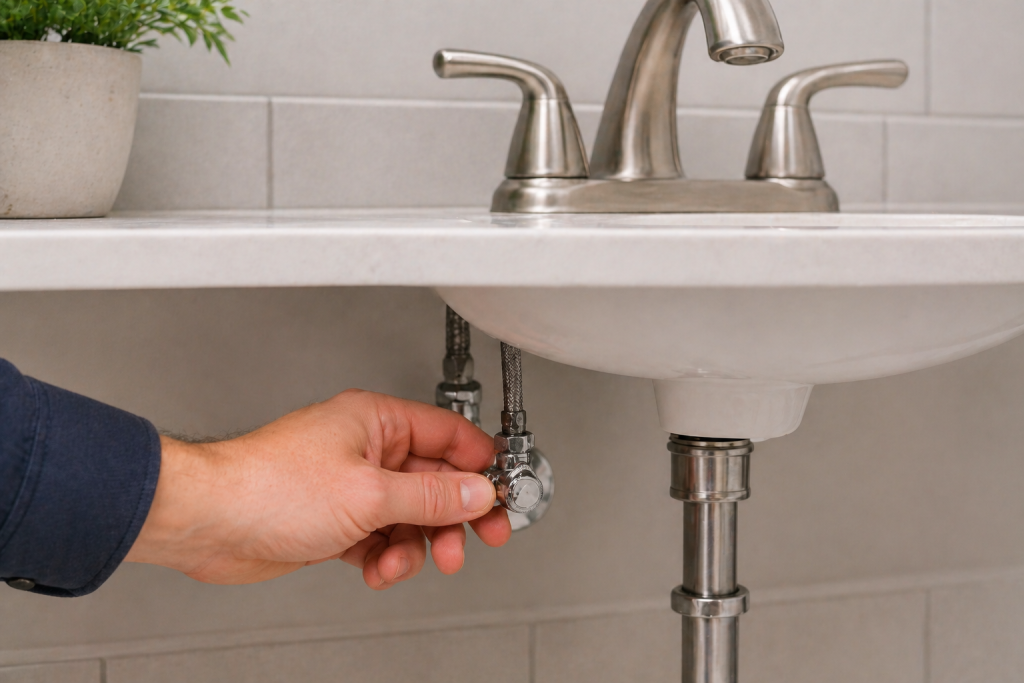
Step 1: Turn Off the Water Supply
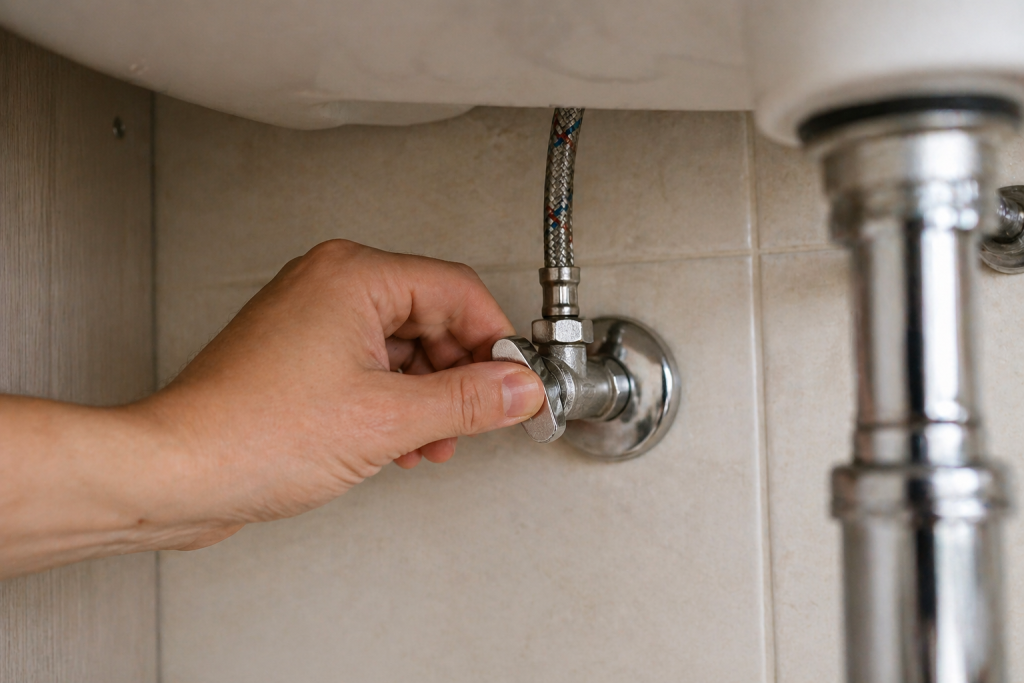
Locate the shut-off valves under the sink and turn them clockwise. Then turn on the faucet to release any remaining water.
If your sink is draining slowly while you’re working, follow this step-by-step guide on how to unclog a drain.
Step 2: Plug the Drain
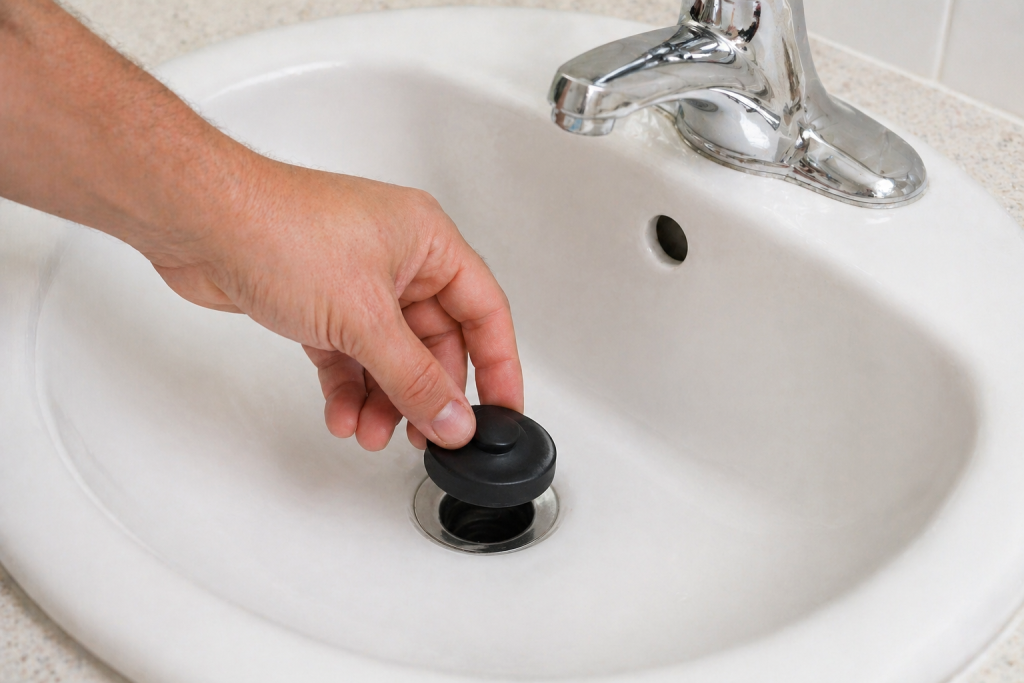
Use a cloth or sink plug to block the drain. This prevents screws or small parts from falling in.
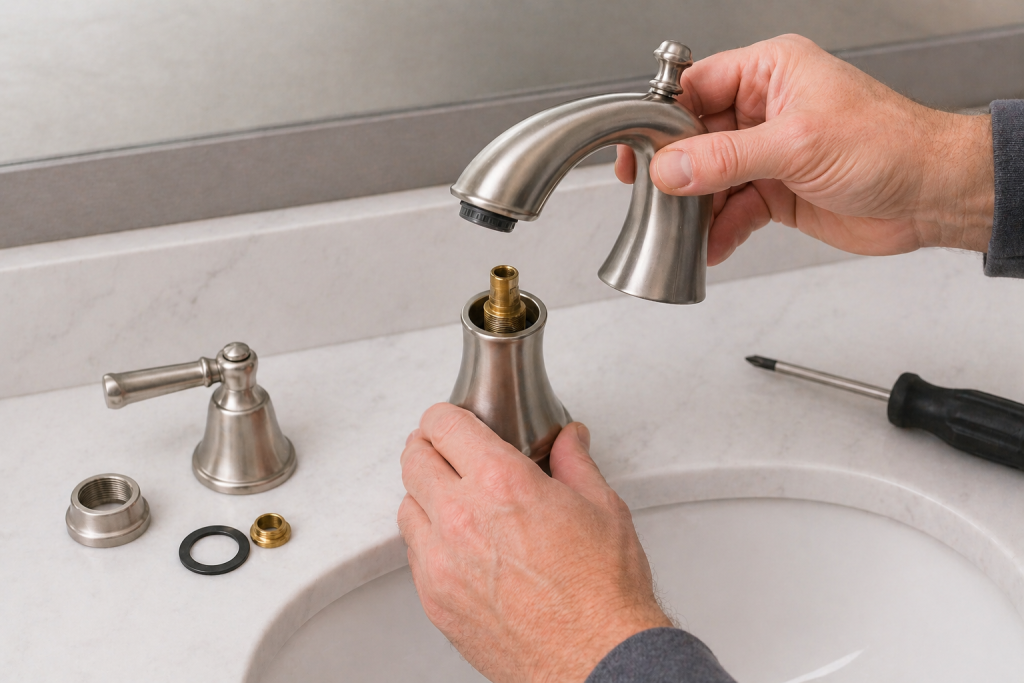
Step 3: Remove the Faucet Handle

Use a screwdriver like this one or Allen wrench like this one to remove the handle. Some faucets have a decorative cap you’ll need to pop off first.
For step-by-step visuals, see Delta Faucet Company’s official guide on removing faucet handles.
Step 4: Identify the Problem
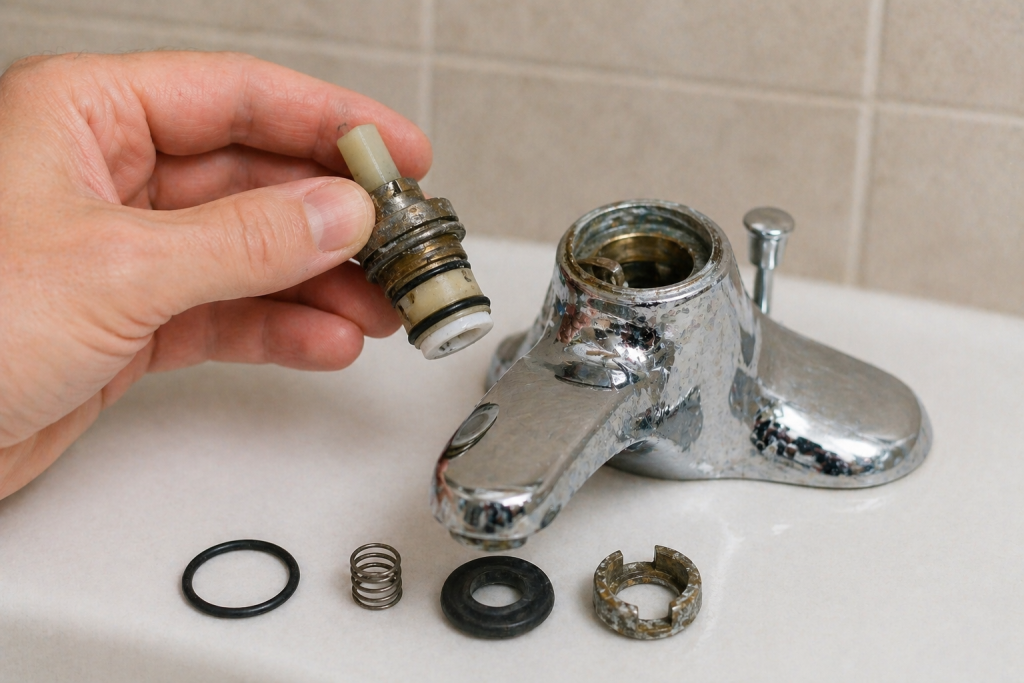
Check these common parts:
- Washer set (grab it here)
- Cartridge
- O-ring
Look for cracks, wear, or buildup.
If your faucet is dripping but the issue seems related to the toilet or other fixtures, you may also want to read how to fix a running toilet.
Step 5: Replace the Faulty Part
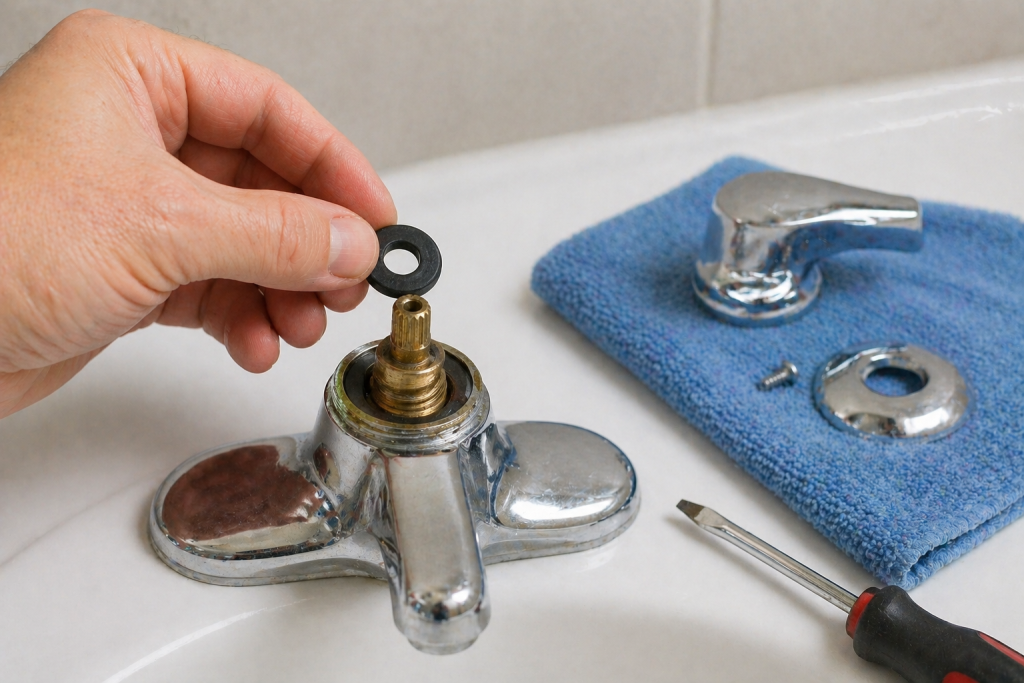
Remove the damaged part and replace it with an identical one. Always match size and type exactly. This is the most important part of learning how to fix a leaky faucet, since replacing the correct component will stop the leak.
Step 6: Reassemble the Faucet
Put everything back together in reverse order. Tighten securely but don’t overtighten.
Step 7: Turn the Water Back On
Turn the water back on slowly and test the faucet.
Common Mistakes to Avoid
- Forgetting to turn off water
- Using the wrong replacement parts
- Overtightening components
- Losing small parts down the drain
Pro Tips for Success on How to Fix a Leaky Faucet
- Take a photo before disassembly
- Bring old parts to the store
- Clean buildup before reinstalling
- Work slowly and carefully
When to Call a Professional to help with How to Fix a Leaky Faucet
- Leak continues after repair
- Pipes are corroded
- Faucet is very old
- You’re unsure what to do
Frequently Asked Questions
Why is my faucet still leaking after replacing the washer?
You may have the wrong size washer, or the cartridge or valve seat may be damaged.
How much does it cost to fix a leaky faucet?
Faucet leak fix DIY repairs usually cost $5–$20. A plumber may charge $75–$150+.
Can I fix a faucet without turning off the water?
No. Always turn off the water first to avoid flooding.
Conclusion
How to fix a leaky faucet is one of the easiest home repairs you can do yourself. With basic tools and a little patience, you can stop the drip, save money, and avoid calling a plumber.
Taking the time to repair a faucet not only eliminates an annoying sound, but also helps conserve water and reduce your monthly utility bills. Even a slow drip can waste gallons of water over time, so addressing the issue promptly makes a real difference.
Learning how to handle small plumbing fixes like this also builds confidence for future DIY projects. Once you understand the basic parts and how they work together, similar repairs become much easier. Plus, regular maintenance—like replacing worn components early—can extend the life of your faucet and prevent bigger, more expensive problems down the road.
In most cases, a simple faucet leak fix DIY is all it takes to restore your faucet to proper working condition, making this a quick win for any homeowner.
Now that you know how to fix a leaky faucet, you can handle this common repair quickly and confidently.