Last updated: May 6, 2026
By Home Repair Genie
A light switch not working can be frustrating, especially when lights suddenly stop turning on or flicker unexpectedly. Fortunately, many light switch problems are caused by simple electrical issues homeowners can safely troubleshoot themselves.
In this guide, you’ll learn how to diagnose a light switch not working step-by-step using simple DIY troubleshooting methods.
Tools You May Need
- Flathead screwdriver
- Phillips screwdriver
- Voltage tester
- Replacement light switch
- Wire nuts
- Flashlight
- Needle-nose pliers
Step 1: Check the Circuit Breaker
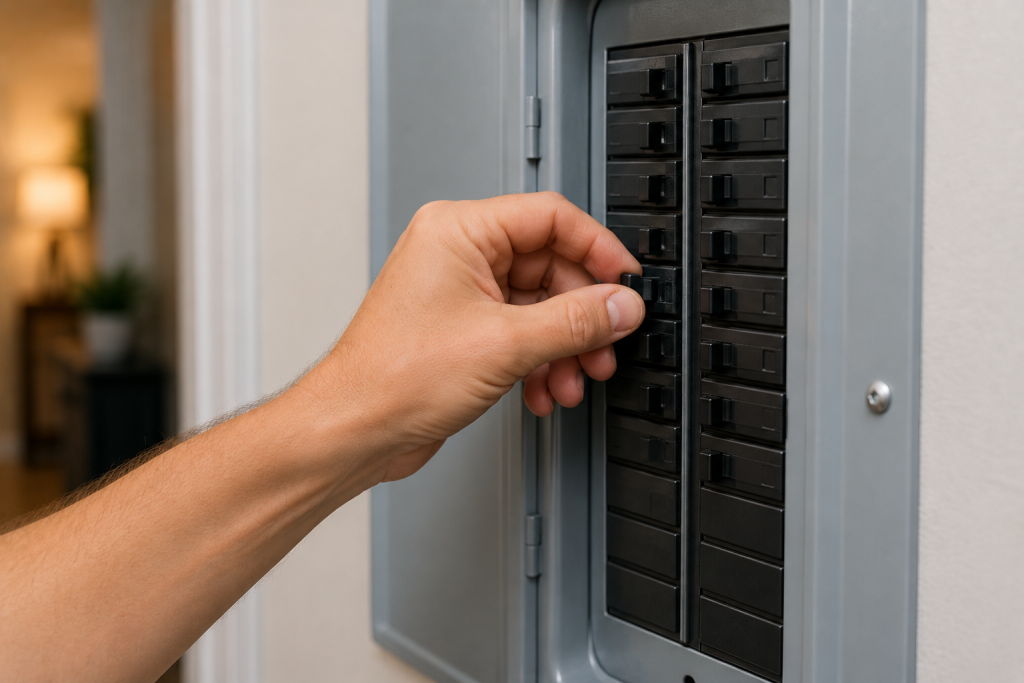
A tripped breaker is one of the most common reasons for a light switch not working.
What to do
- Go to your home’s electrical panel
- Look for a breaker that is partially flipped or OFF
- Reset the breaker by turning it OFF fully and then back ON
- Test the light switch again
If the breaker trips repeatedly, there may be a wiring problem or overloaded circuit.
For more help, read our guide on how to fix a tripped circuit breaker.
Step 2: Replace the Light Bulb
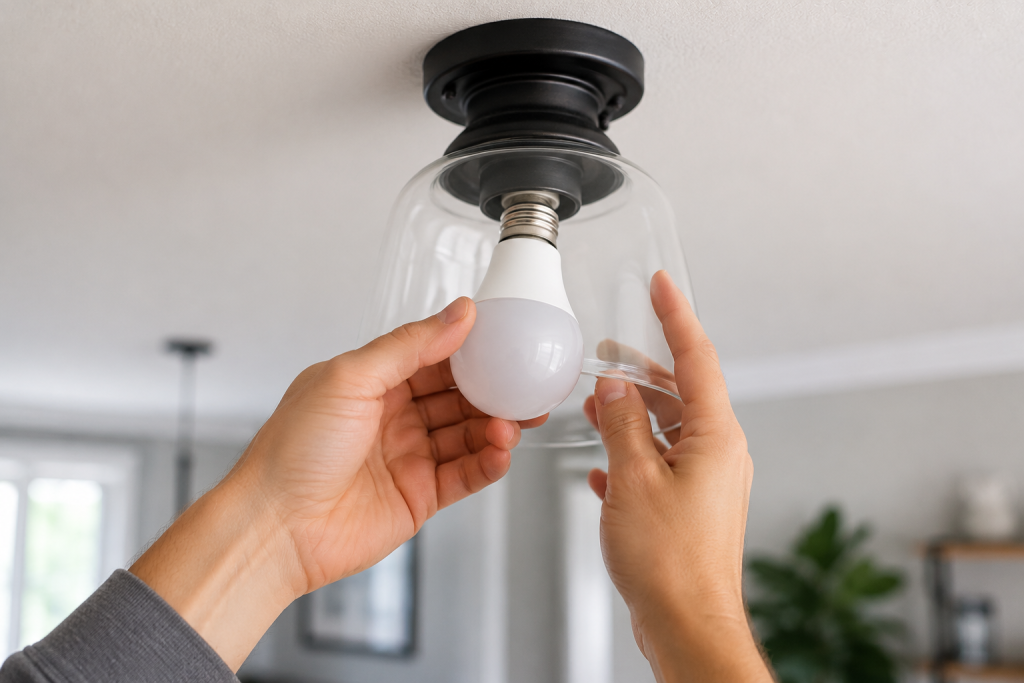
Sometimes the switch is fine and the real problem is simply a burned-out bulb.
What to do
- Turn OFF the light switch
- Remove the existing bulb
- Install a new bulb with the correct wattage
- Turn the switch back ON
LED bulbs can occasionally fail suddenly without visible damage.
If your lights flicker before failing, check out our article on why lights are flickering.
Step 3: Test the Outlet or Fixture for Power
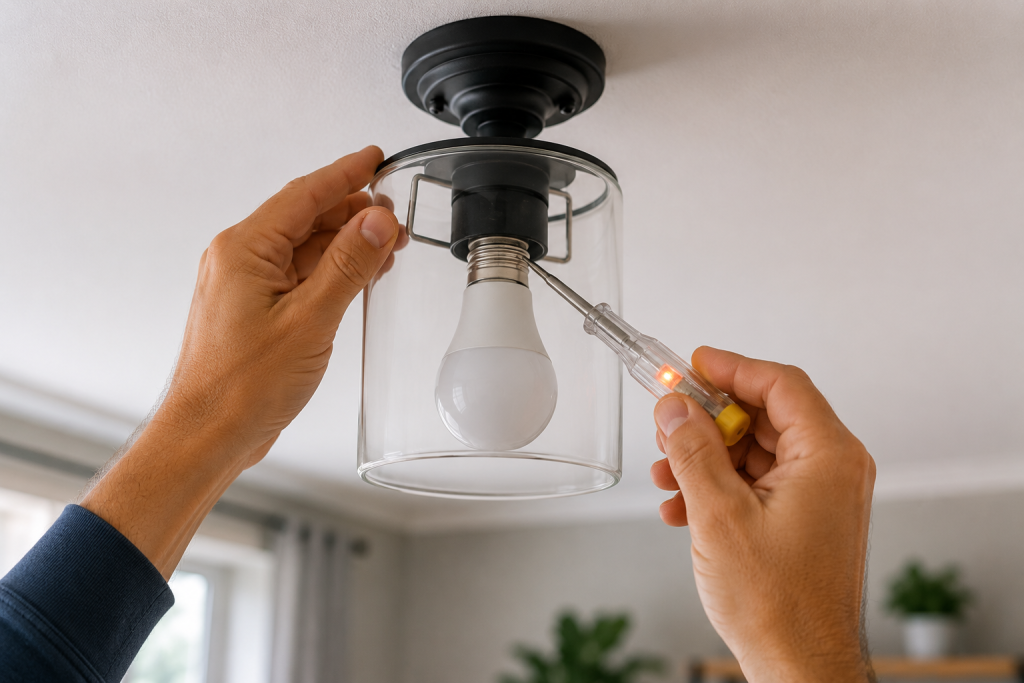
If the switch still does not work, verify whether electricity is reaching the fixture.
What to do
- Use a voltage tester on the fixture or outlet
- Confirm nearby outlets still have power
- Check whether other lights in the room work
- Test the switch several times
A light switch not working can sometimes be caused by loose wiring elsewhere on the same circuit.
For related troubleshooting tips, read our guide on how to fix an outlet not working.
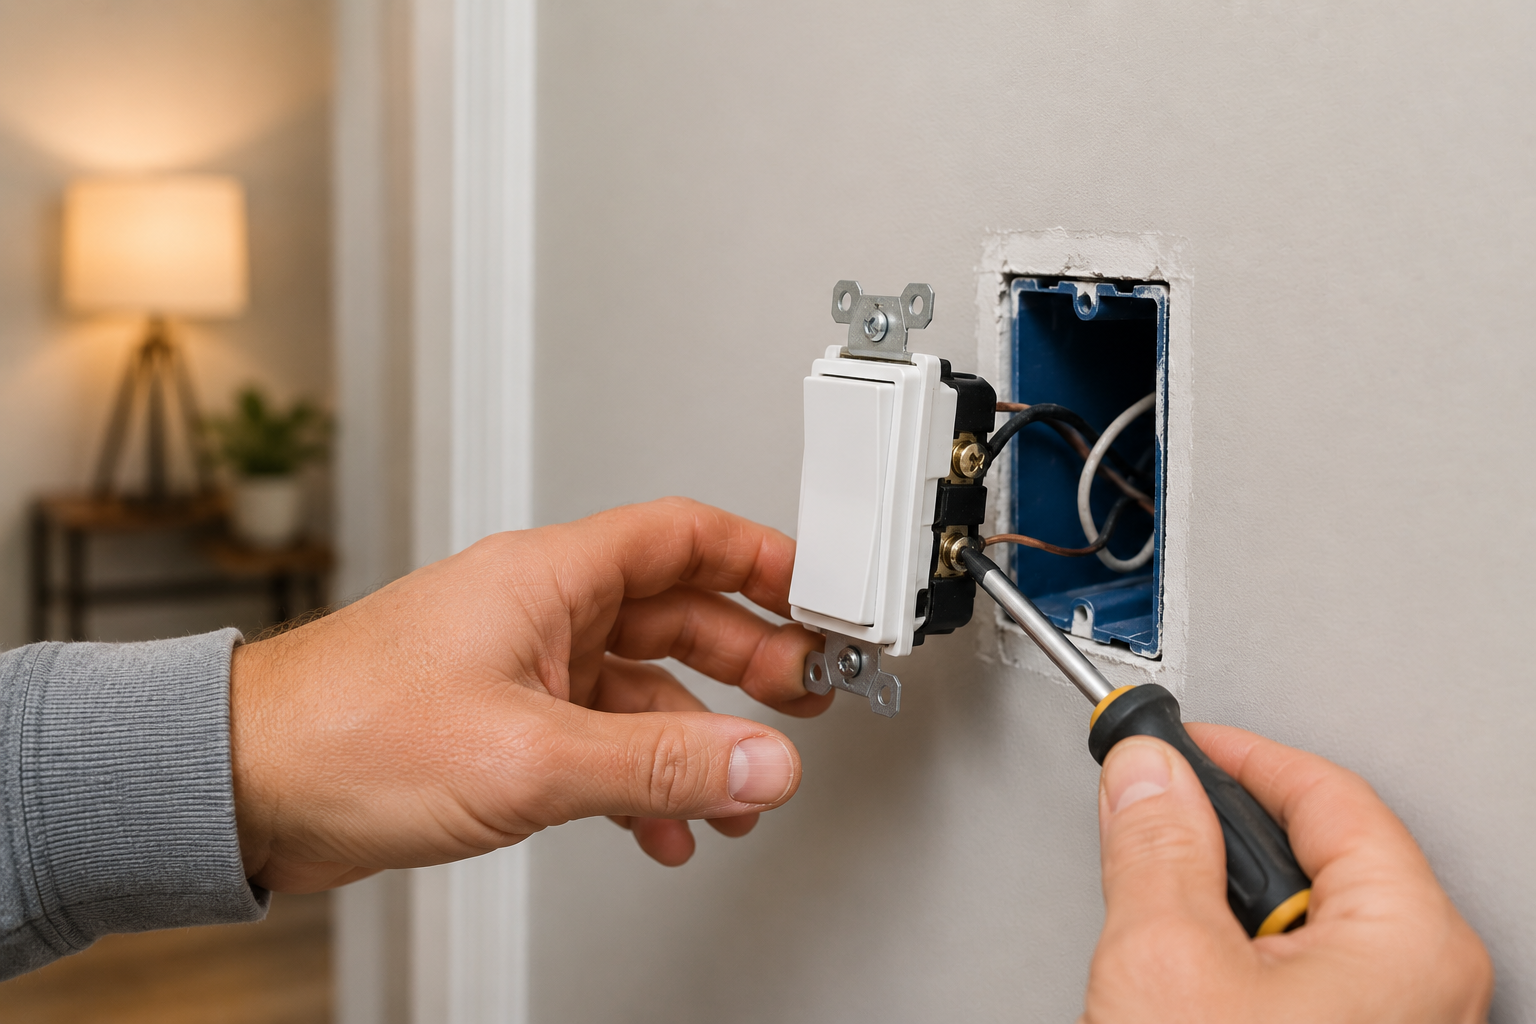
Step 4: Remove the Switch Cover Plate
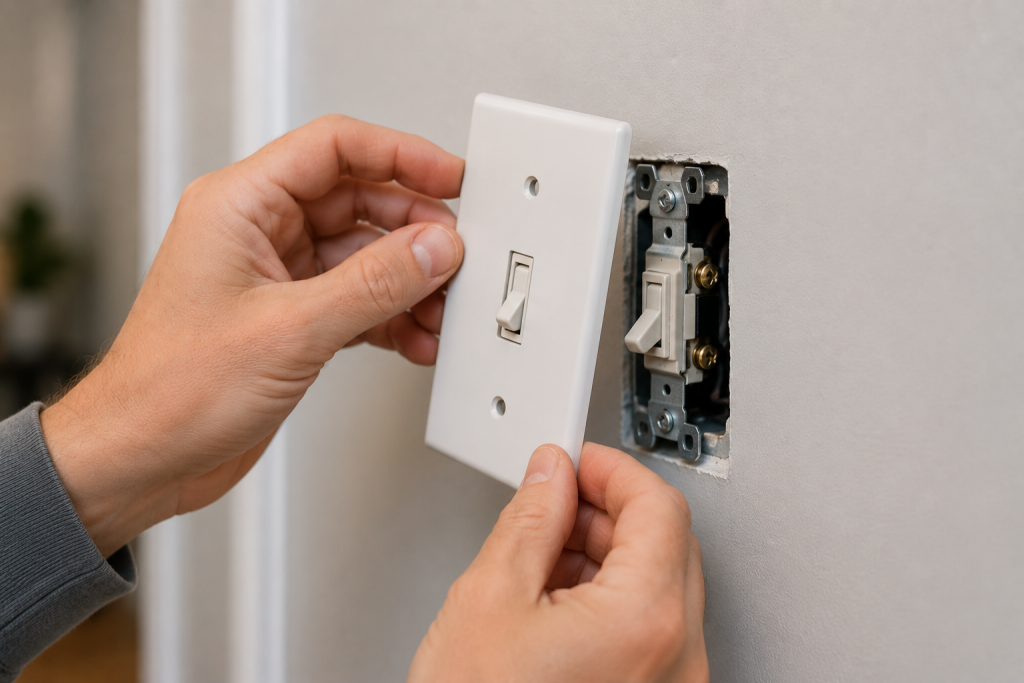
Before inspecting wiring, always turn OFF power at the breaker first.
What to do
- Turn OFF the breaker controlling the switch
- Remove the wall plate screws
- Carefully pull the switch outward
- Inspect the switch for damage, burn marks, or loose wires
Loose terminal screws are a very common cause of a light switch not working.
Step 5: Tighten Loose Wiring Connections
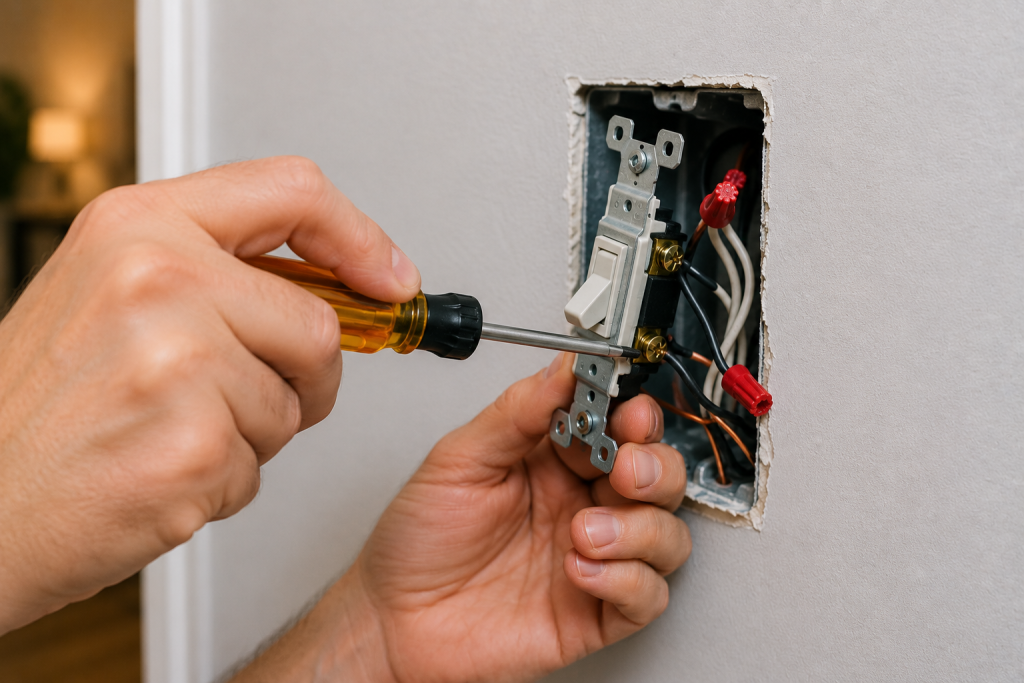
Over time, wires can loosen from repeated use or vibration.
What to do
- Check all terminal screws carefully
- Tighten any loose wires
- Inspect wire nuts inside the electrical box
- Look for damaged insulation or burn marks
- Restore power and test the switch
If you see blackened wires or melted plastic, stop immediately and contact a licensed electrician.
Step 6: Replace the Faulty Light Switch
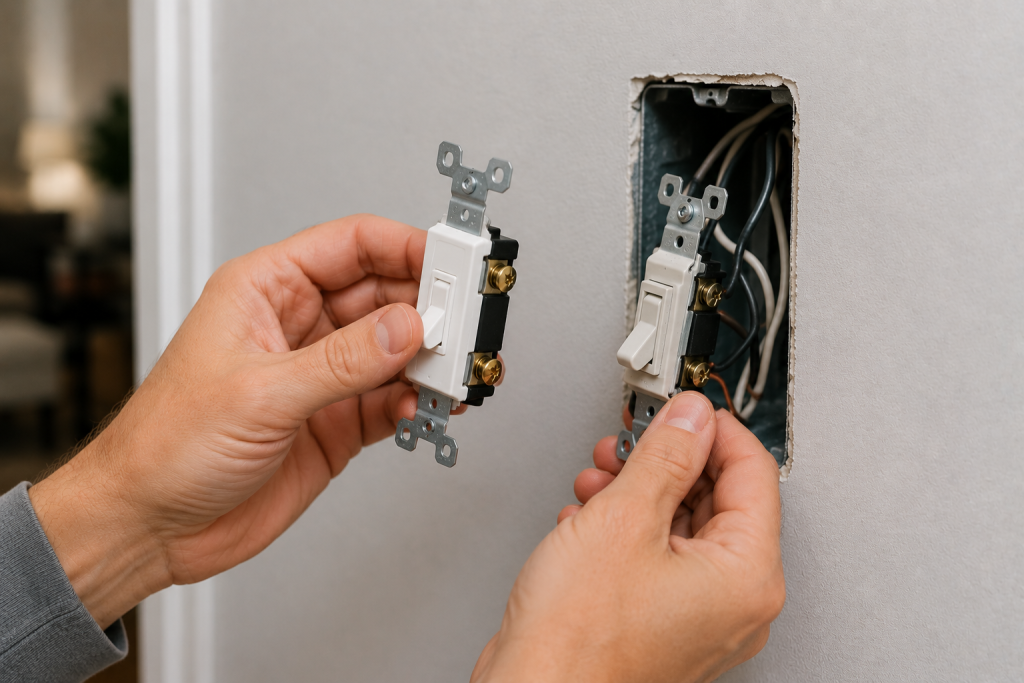
If the wiring appears fine, the switch itself may have failed internally.
Signs of a bad switch
- Crackling sounds
- Flickering lights
- Loose toggle feel
- Sparks when flipped
- Switch feels warm
What to do
- Turn OFF power at the breaker
- Disconnect the old switch wiring
- Install a matching replacement switch
- Tighten the wires securely
- Restore power and test the new switch
Modern switches are inexpensive and often easier to replace than repair.
Step 7: Call an Electrician for Persistent Problems
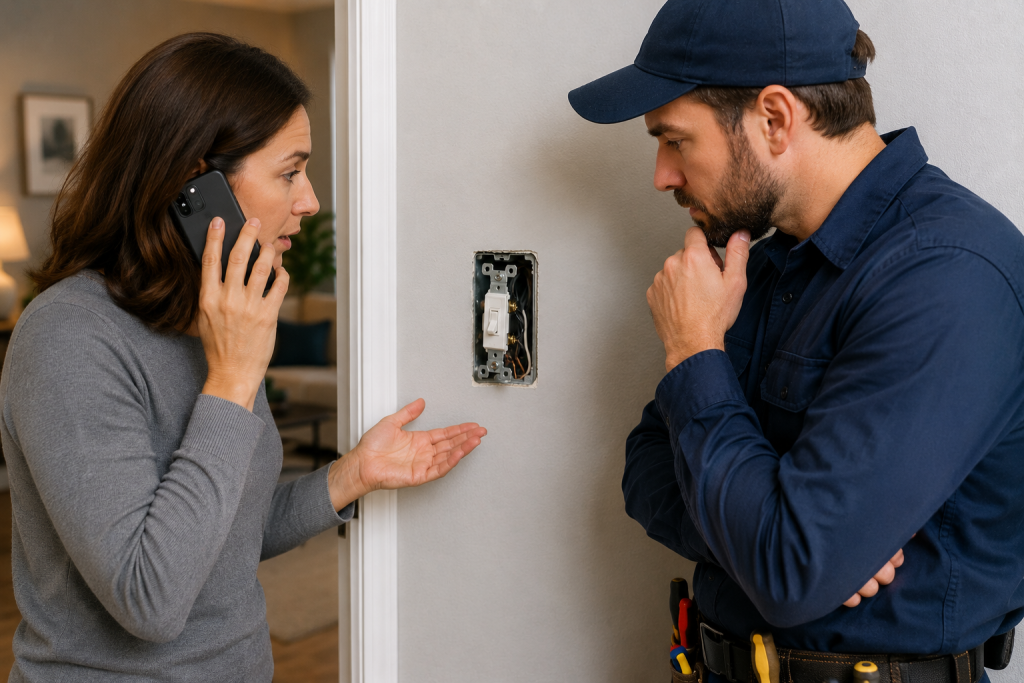
If your light switch not working problem continues after replacing the switch, there may be a deeper electrical issue.
Call a professional if:
- Breakers continue tripping
- Multiple switches fail
- You smell burning odors
- Wiring appears damaged
- Lights dim throughout the house
Electrical repairs can become dangerous if handled incorrectly.
You can also review electrical safety recommendations from This Old House
Common Causes of a Light Switch Not Working
| Problem | Possible Cause |
|---|---|
| Switch does nothing | Tripped breaker |
| Lights flicker | Loose wiring |
| Switch crackles | Bad switch contacts |
| Light stays OFF | Burned-out bulb |
| Multiple switches fail | Circuit issue |
Safety Tips for Electrical Repairs
- Always turn OFF power at the breaker first
- Use a voltage tester before touching wires
- Never work on live electrical wiring
- Wear rubber-soled shoes when troubleshooting
- Stop immediately if you see burned wires
Frequently Asked Questions
Why is my light switch not working but the breaker is fine?
A light switch not working with a normal breaker is often caused by a bad switch, loose wiring, or a failed light fixture.
Can a bad light switch be dangerous?
Yes. Faulty switches can overheat, spark, or create fire hazards if ignored.
How long do light switches last?
Most standard light switches last 10–20 years depending on use.
Should I replace a light switch myself?
Many homeowners can safely replace a basic switch if power is turned OFF properly before working.
Final Thoughts
A light switch not working does not always mean there is a major electrical problem. In many cases, the issue is something simple like a tripped breaker, loose wire, or worn-out switch.
By following these step-by-step troubleshooting methods, many homeowners can safely diagnose and repair common switch problems themselves.
Most light switch not working issues can be fixed quickly with basic tools and careful safety precautions.