Last updated: June 19, 2026
By Home Repair Genie
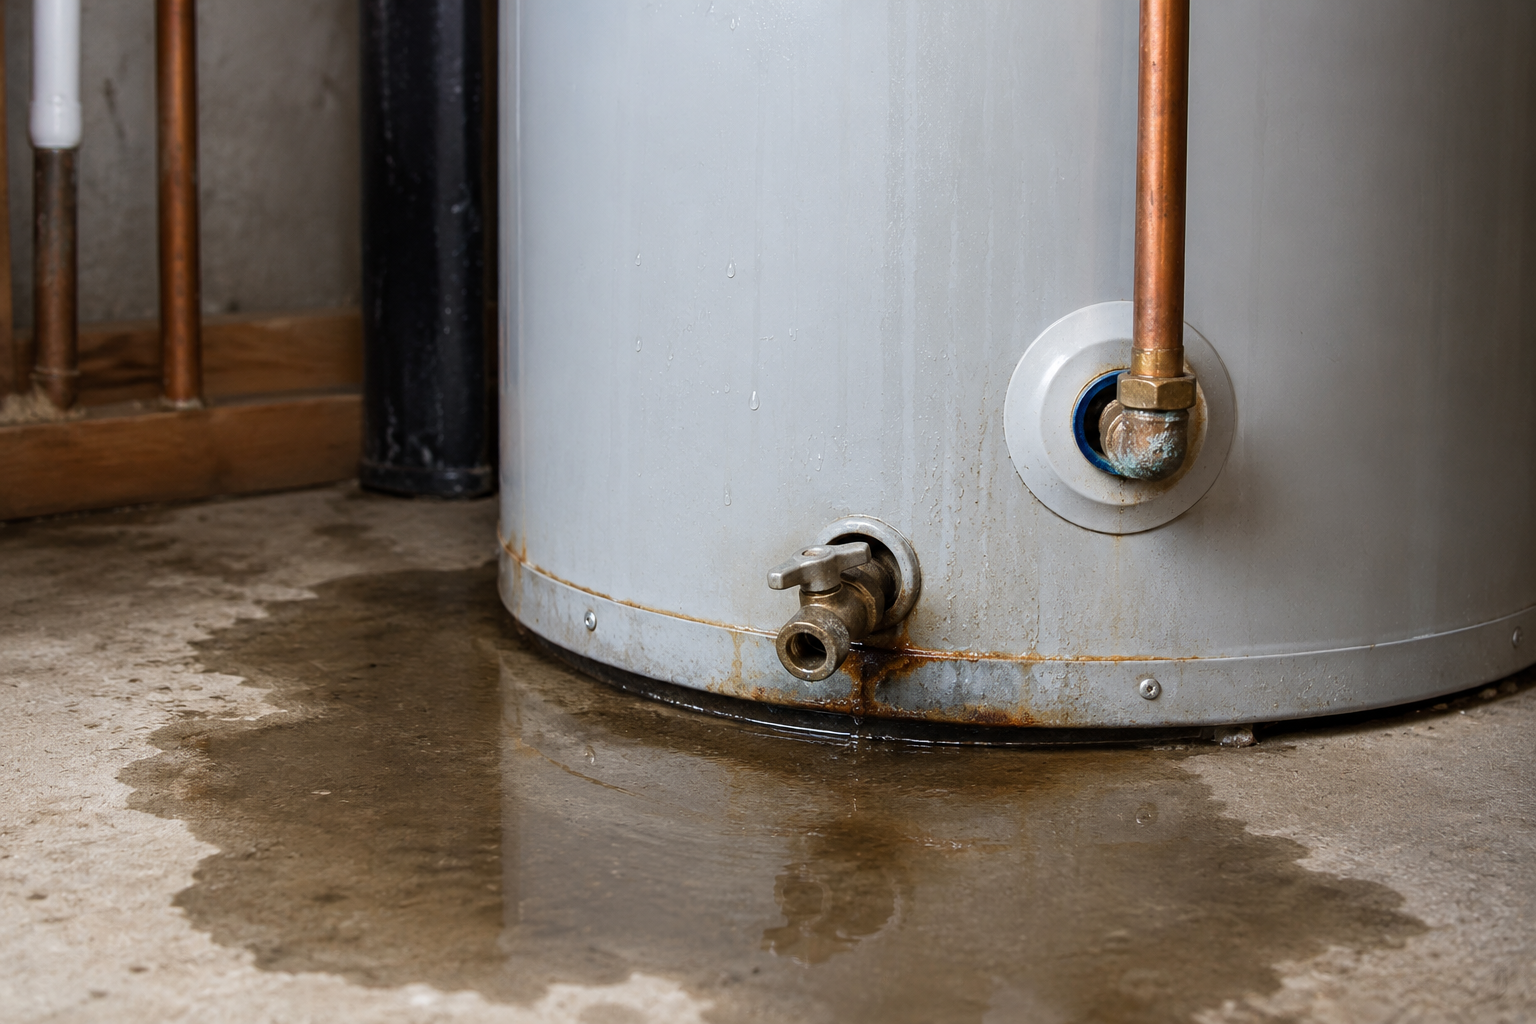
A water heater leaking from bottom sections of the tank can quickly cause water damage, mold growth, and costly repairs. While some leaks originate from simple issues such as loose drain valves or condensation, others indicate that the tank itself has failed and needs replacement.
This guide explains how to identify the source of the leak and the steps you can take to fix the problem.
Quick Answer
If you have a water heater leaking from bottom problem, first determine whether the water is coming from the drain valve, temperature and pressure relief valve, plumbing connections, condensation, or the tank itself. Tightening fittings or replacing a faulty valve may solve the issue. However, if the tank is leaking due to internal corrosion, replacement is usually the only solution.
Causes of Water Heater Leaking from Bottom
Water heater leaking from bottom does not always mean the tank has failed. Water can travel down the exterior of the unit and collect underneath, making the actual source difficult to identify.
Common causes include:
- Loose drain valve
- Faulty temperature and pressure relief valve
- Leaking water supply connections
- Excessive condensation
- Cracked drain fitting
- Corroded tank interior
- Sediment buildup causing overheating
Identifying the source of the leak is the first step toward a successful repair.
Fix 1: Check for Condensation
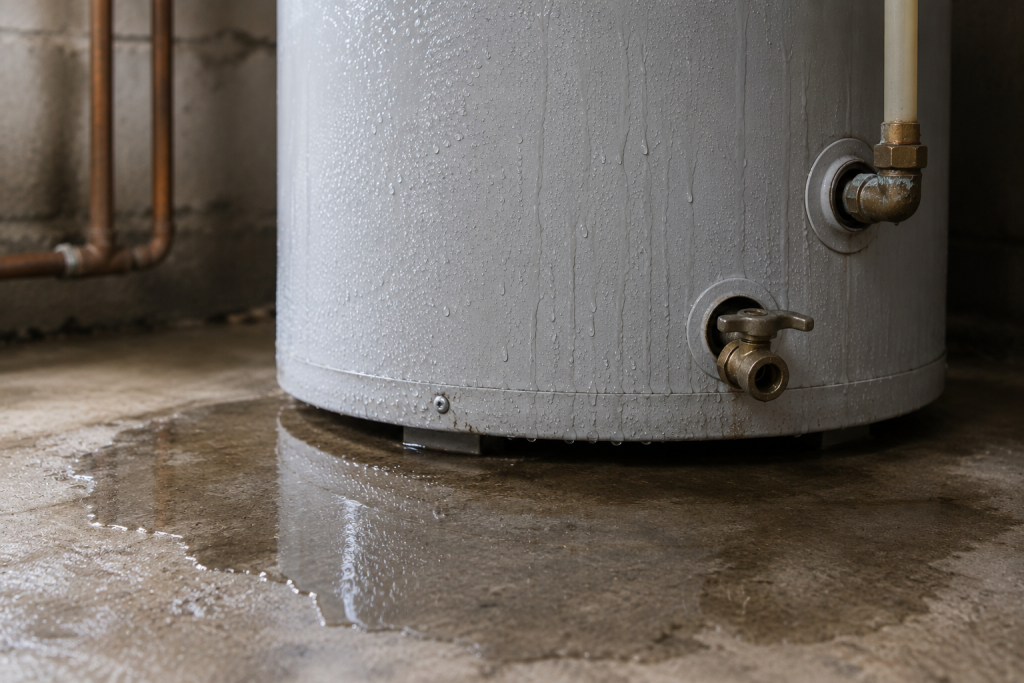
Step 1: Inspect the Outside of the Tank
During periods of high humidity, cold water entering the tank can create condensation on the exterior surface.
Look for:
- Moisture covering large areas of the tank
- Water droplets forming evenly around the tank
- No obvious leak points
Step 2: Monitor Water Usage
Heavy hot water usage followed by tank refilling can temporarily increase condensation.
If the moisture disappears after several hours, condensation is likely the cause rather than a leak.
Fix 2: Inspect the Drain Valve
Step 1: Locate the Drain Valve
The drain valve is usually positioned near the bottom of the tank.
Check for:
- Water dripping from the valve opening
- Moisture around the valve threads
- Mineral deposits indicating a slow leak
Step 2: Tighten the Valve
Use caution and gently tighten the valve if it appears loose.
Do not overtighten, as plastic valves can crack.
Step 3: Replace a Faulty Valve
If tightening does not stop the leak, replacing the drain valve may be necessary.
For more plumbing troubleshooting tips, see our guide on Low Water Pressure in Kitchen Sink? 7 Easy Fixes That Actually Work.
Fix 3: Check the Temperature and Pressure Relief Valve
Step 1: Locate the T&P Valve
The temperature and pressure relief valve is usually mounted near the top side of the tank.
Step 2: Inspect the Discharge Pipe
Water released through this valve often travels down the discharge pipe and pools beneath the heater.
Look for:
- Water around the discharge pipe
- Dripping from the valve outlet
- Signs of recent discharge
Step 3: Determine the Cause
A leaking relief valve may indicate:
- Excessive tank pressure
- Faulty valve operation
- Overheating water
A plumber may be needed if pressure issues are present.
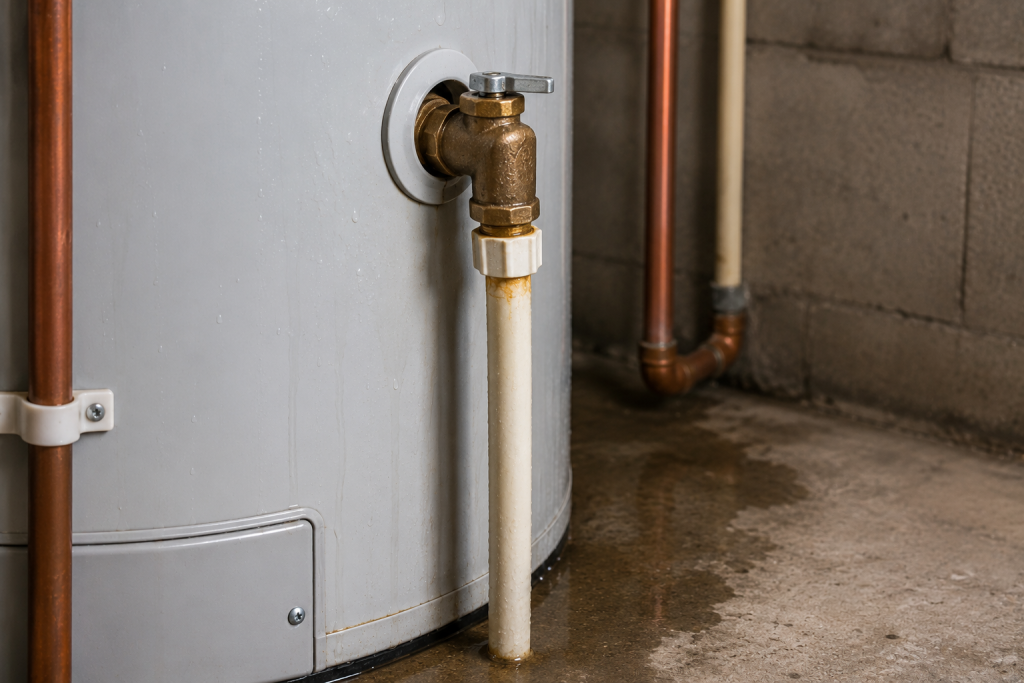
Fix 4: Examine Water Supply Connections
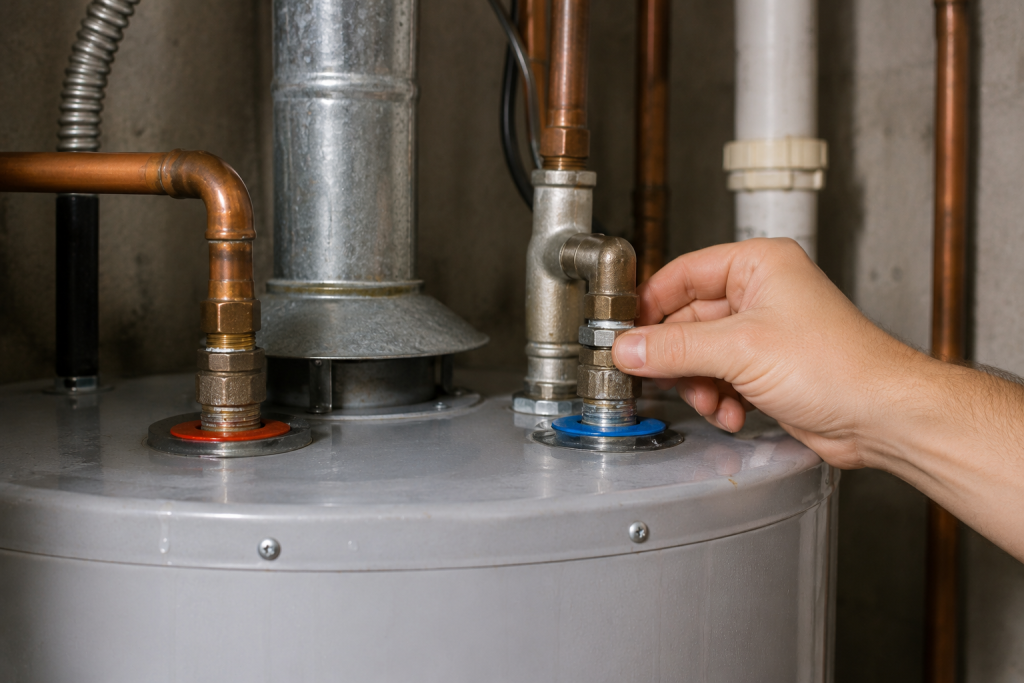
Step 1: Check Hot and Cold Water Lines
Inspect the fittings where the plumbing connects to the top of the water heater.
Step 2: Look for Water Trails
Leaks from the top often run down the sides of the tank and appear underneath.
Use a flashlight to look for:
- Drips
- Corrosion
- Mineral buildup
Step 3: Tighten Loose Connections
If a fitting appears loose, carefully tighten it with the appropriate wrench.
If corrosion is severe, replacement may be required.
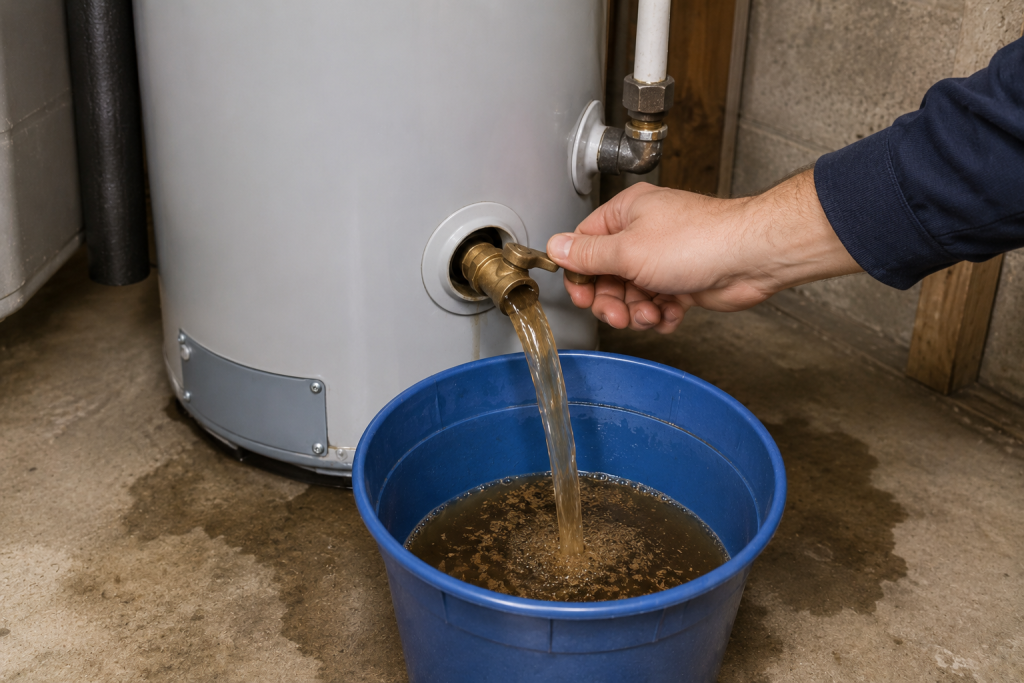
Fix 5: Flush Sediment From the Tank
Step 1: Turn Off Power or Gas
Follow manufacturer instructions before servicing the water heater.
Step 2: Attach a Garden Hose
Connect a hose to the drain valve and route it to a safe drainage location.
Step 3: Drain Sediment
Sediment accumulation can cause overheating and premature tank failure.
Routine flushing helps extend water heater life.
The experts at U.S. Department of Energy recommend regular water heater maintenance to improve efficiency and longevity.
Fix 6: Inspect the Bottom of the Tank for Corrosion
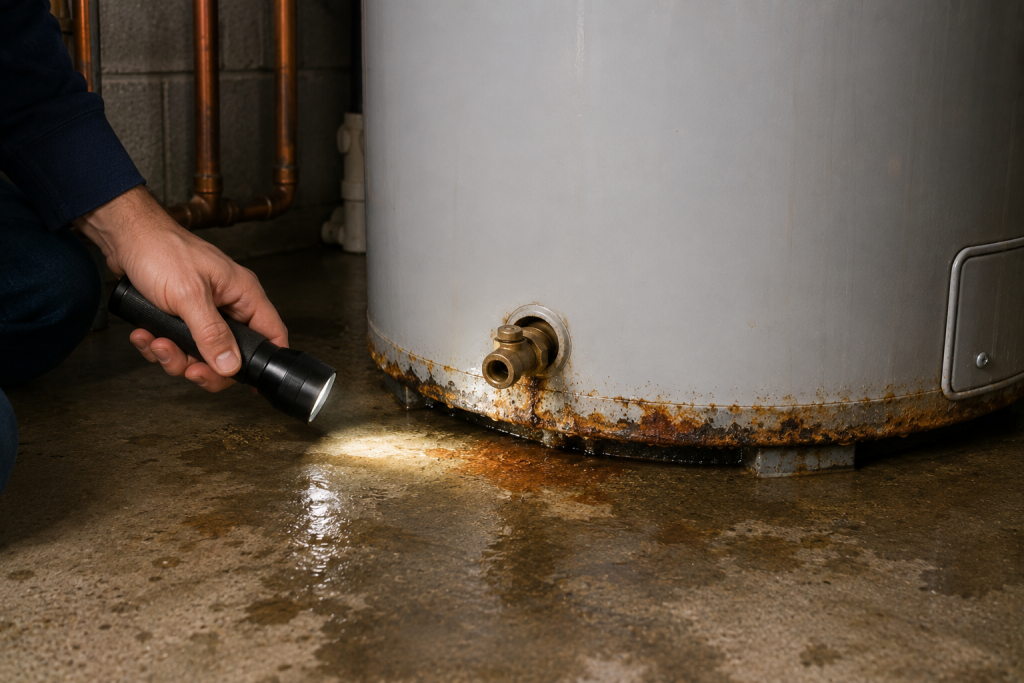
Step 1: Look for Rust
Use a flashlight to inspect the underside of the water heater.
Warning signs include:
- Rust streaks
- Corrosion around seams
- Water seeping directly from the tank body
Step 2: Check the Tank Age
Most residential water heaters last approximately 8 to 12 years.
If your unit is nearing this age and leaking from the tank itself, replacement is usually more cost-effective than repair.
Fix 7: Replace a Failed Water Heater
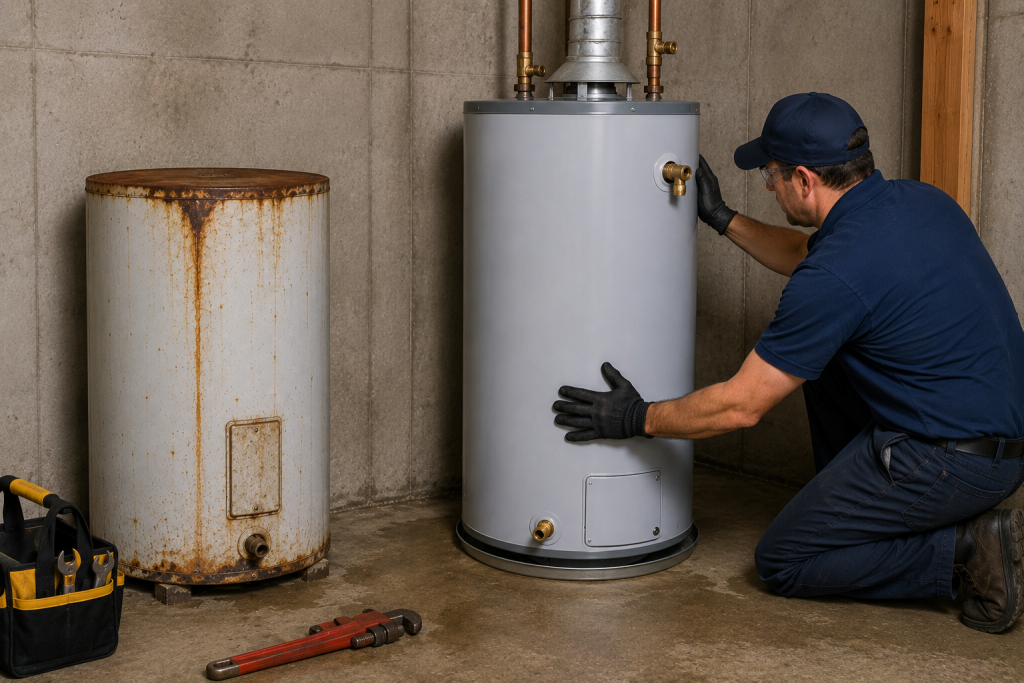
Step 1: Confirm the Tank Is Leaking
A failed tank often produces:
- Constant leaking
- Rust-colored water
- Corrosion around the bottom seam
Step 2: Turn Off Utilities
If the leak is significant:
- Shut off water supply
- Turn off electricity or gas
- Contact a plumbing professional
Step 3: Install a New Water Heater
Modern water heaters are generally more efficient and reliable than older units.
If your heater has already reached the end of its service life, replacement is often the best long-term solution.
You may also want to review our guides on Water Heater Not Producing Hot Water? 7 Easy Fixes That Actually Work (Step-by-Step Guide) and Furnace Blowing Cold Air? 7 Easy Fixes That Actually Work (Step-by-Step Guide) if you’re troubleshooting additional home comfort issues.
When to Call a Professional
Contact a plumber if:
- Water is leaking directly from the tank
- The relief valve continues discharging water
- You suspect excessive water pressure
- Corrosion is extensive
- The leak is causing property damage
A professional can quickly determine whether repair or replacement is the better option.
How to Prevent Future Water Heater Leaks
Preventive maintenance can significantly extend water heater life.
Best practices include:
- Flush sediment annually
- Test the T&P valve periodically
- Inspect plumbing connections yearly
- Check for corrosion around fittings
- Install a drain pan where required
- Replace aging water heaters before failure occurs
Regular inspections can help catch small issues before they become major leaks.
Frequently Asked Questions for Water Heater Leaking from Bottom
Is a water heater leaking from the bottom dangerous?
It can be. Small leaks may cause water damage over time, while larger leaks can damage flooring, walls, and nearby belongings. Gas and electrical water heaters also present additional safety concerns.
Can a leaking water heater be repaired?
It depends on the source. Drain valves, fittings, and relief valves can often be repaired or replaced. A leaking tank generally cannot be repaired and requires replacement.
How long do water heaters usually last?
Most traditional tank-style water heaters last between 8 and 12 years with proper maintenance.
Why is there water under my water heater but no visible leak?
Condensation, relief valve discharge, or leaks from upper plumbing connections can cause water to collect underneath the heater.
Should I turn off my water heater if it is leaking?
Yes. If the leak is significant or appears to come from the tank itself, shut off the water supply and power source until the problem is diagnosed.
Final Thoughts
A water heater leaking from bottom locations does not always mean the tank has failed. In many cases, a loose drain valve, faulty relief valve, plumbing connection, or condensation issue is responsible. However, if corrosion has compromised the tank itself, replacement is usually unavoidable.
By identifying the true source of the leak and addressing it promptly, you can minimize water damage and restore reliable hot water to your home.